How to make a uncomplicated picture frame. This stage by step tutorial exhibits you how to make plywood and plexiglass frames to display screen photographs or enjoyment vacation printables! 
These are seriously fun to make and show your favored pictures, printables.
Or you can make them as a present!
Do-it-yourself Custom made Photo Frames
I am making use of these with Xmas printables for now but these will lastly go on the white wall reverse the colorful accent wall in the youngsters&rsquo area.
With all that shade heading on, I preferred to provide in some warm wooden tones. but we have a very special set of child shots of the youngsters that have been in their place permanently! I questioned them if they wished me to improve them out but both unanimously agreed they continue to preferred them!
We experienced been making use of basic white Ikea frames so I resolved to use this opportunity to generate entertaining frames and also use up some scrap plywood in the procedure. (There is something about the pleasure you get from working with scrap wood&hellip)
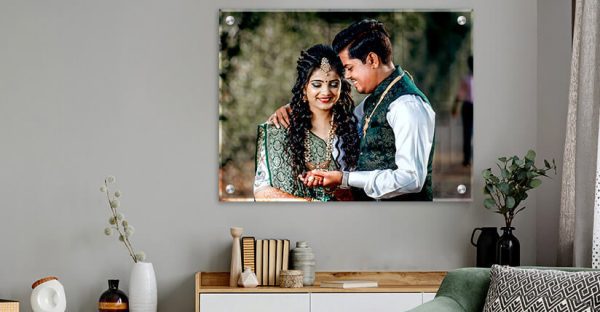
The pics can be conveniently switched out by just getting off all those screws! I additional some succulent printables just for enjoyment.
Rustoleum sent me their white and black wood grain enhancer to consider out and I adore the outcome it provides.
Just take a search closer! It&rsquos fairly awesome! 
Elements essential to make the simple image body:
- Plywood &ndash reduce to dimension. I utilized 8&Primex10&Primary
- Plexiglass &ndash reduce to dimensions. I used 7&Primex9&Prime
- Masking tape
- ¾&rdquo wooden screws
- Stain of your selection &ndash I utilized Golden Oak by Varathane
- White wooden grain enhancer
- Black wooden grain enhancer
- Metal brush
- Straight edge and box cutter &ndash to reduce the Plexiglass
- (optional) BladeRunner X2 &ndash to slice the Plexiglass
- Drill
- Screwdriver
If you are a visible individual like me, below are the proportions &ndash 
Creating the frames is pretty very simple and simple. On the other hand, I acquired a few matters operating with plexiglass for the 1st time. I have highlighted that under. Just pay back interest to these and making these screen frames will be a snap!
Below is the complete movie tutorial on how t make the frames. click published guidelines observe.
How to make the wood and plexiglass frames &ndash
Stage one &ndash Start by staining the plywood in the coloration of your alternative. I used Golden Oak mainly because it intently matches the Hardwood flooring in the space.Step two &ndash If you are using the grain enhancer, wipe the floor with drinking water to aid pop the grain. When the surface area is nonetheless wet, scrub it with the steel brush. This is incredibly critical to get the grain enhancer to function. Phase three &ndash Once the area is dried, wipe it nicely and use the wood grain enhancer versus the grain. Wipe it off immediately after a number of minutes with a light-weight hand in the similar route you utilized it.
Phase 4 &ndash Get your plexiglass ready. To minimize the plexiglass, you can use a straight edge and a box cutter to score seven-8 situations and snap. It produces a quite clean minimize. I required to make 4 of the frames so I decided to carry out my BladeRunner X2 which helped make the course of action a little bit a lot quicker.Phase 5 &ndash Measure the area and place the plexiglass on the plywood. I made use of masking tape to hold it in its location. Then I calculated and marked the places for the screws.
Action 6 &ndash Use a drill bit that is huge enough for the screw to go via conveniently. I employed a five/32&Primary. Drill very slowly and gradually! The masking tape keeps the plexiglass from cracking. At the time you strike the wood on the bottom, you will come to feel resistance. Quit when you have created a pilot hole in the wood.Move seven &ndash Place the image or printable on the plywood. Use double-sided tape to keep it in position. Get rid of protecting covering from the plexiglass and connect with the wooden screw. It is critical to use a guide screwdriver so you have regulate on the tension and how far the screw goes. If not, you can end up cracking the plexiglass.
 Add Sawtooth hangers on the again and cling them up! 
The wooden grain enhancer provides a awesome influence! I made use of the black wooden grain enhancer on two and the white on two.
I can&rsquot make a decision if I like the black more&hellipOr the white&hellip